
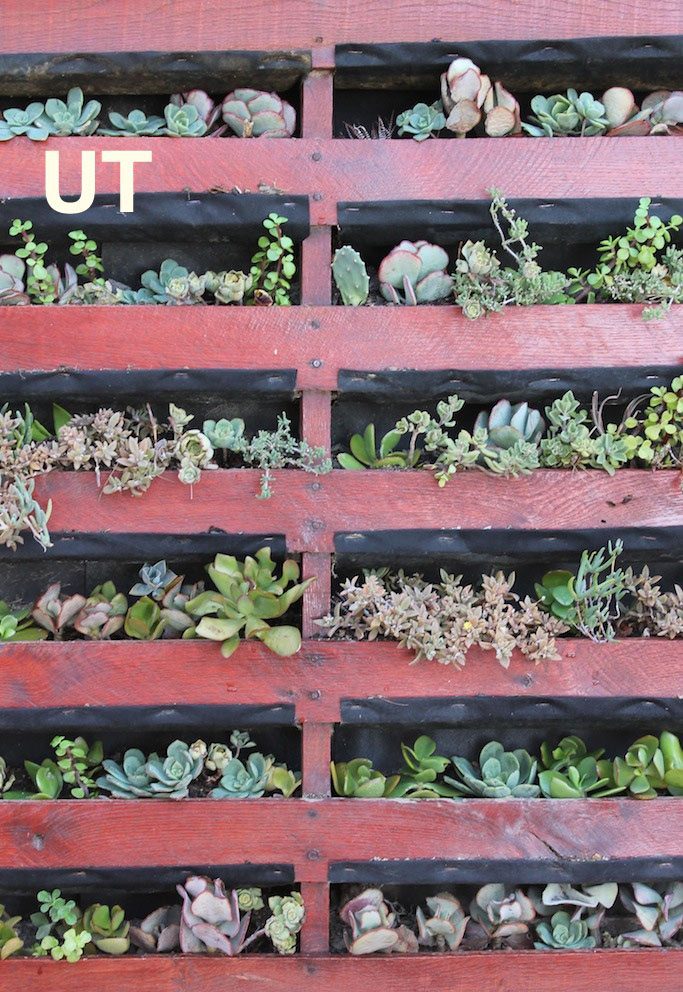
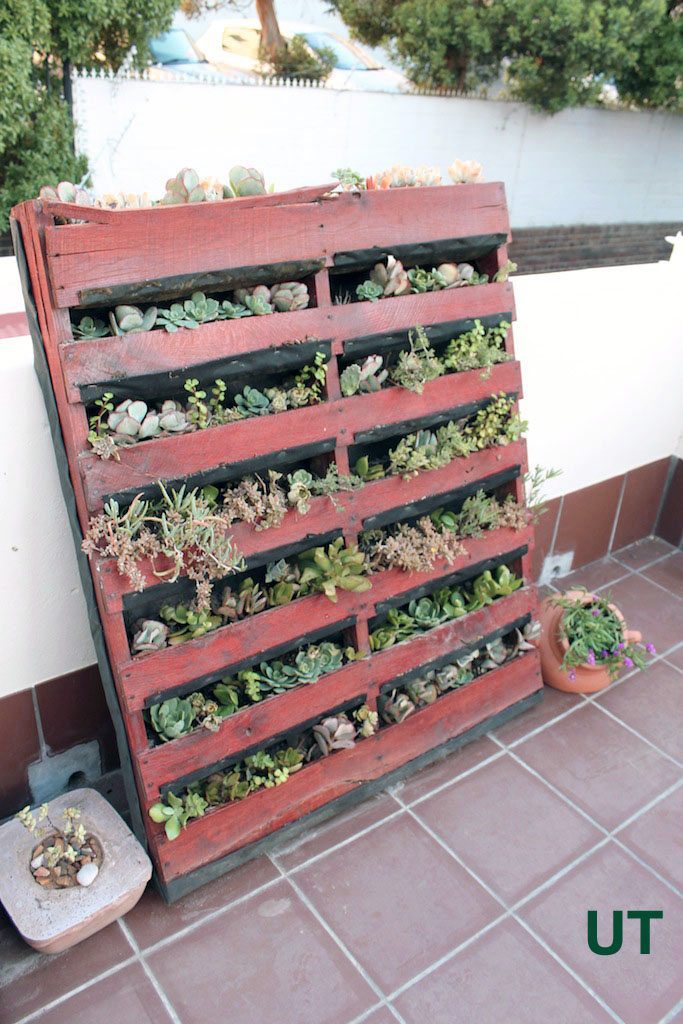
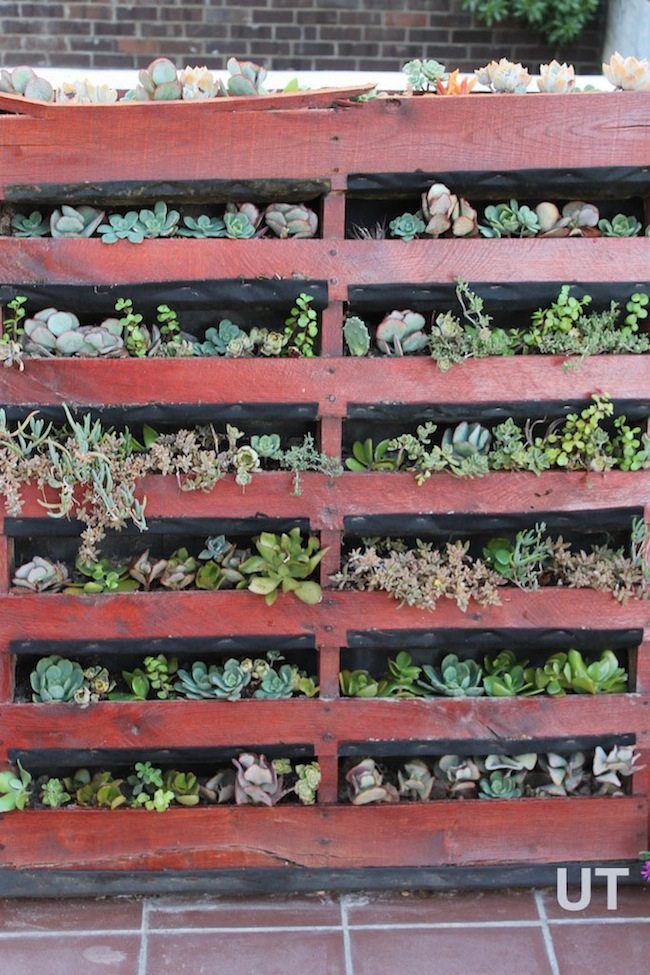
This vertical pallet planter was the first project we did together as Upcycle That. Completed over a year ago, the succulents have had time to settle in. This is a great project. As you will see, pallets and succulents work well together.
This vertical pallet planter can be tackled at an intermediate upcycling level. You have to be prepared to sand, but there is no nailing/sawing/drilling required. Your main weapon of choice will be a staple gun.

While not too challenging, there are 2 parts to creating this beauty. Let it be known that pallets from the side of the road don’t appear pre-stained.
That said, the results of this project are strikingly gorgeous. A vertical planter is the ultimate display case for patio gardening. Dramatically packed with flora, it brings a burst of green to an outdoor urban space. This vertical planter will work your wall like a show girl and the best part is that its made from a pallet. Pallets are readily available, inexpensive and can even be found around town for free.
Part 1 – Make your pallet planter ready
Step 1 – The first step is to source a pallet, sand and paint it. Pallet wood is quite rough so we recommend using a sanding block or electric sander. Once you’ve sanded, treat the wood as per your preference. We chose a glossy russet brown stain for this project.
Part 2 – The pocket tray method
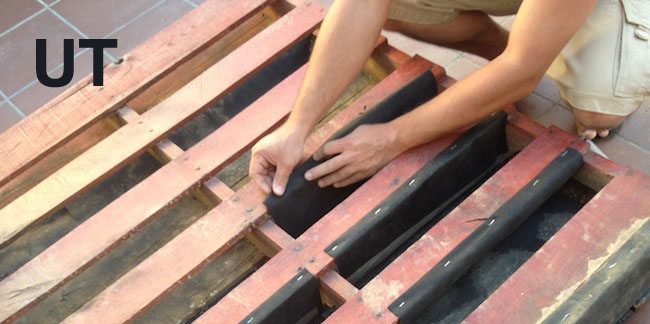
In the pocket tray method you staple landscaping fabric from the top of back panels to the top of the front. This creates pocket trays for your soil.

The diagram to the right shows the different pockets and how they should be stapled.
Step 1 – Measure your pocket tray lengths. You will notice that the front of the pallet has 7 beams, and the back only 4. So, pockets 1 and 2 will connect to back beam 1. Pockets 3 and 4 to back beam 2. Pockets 5 and 6 to back beam 3. Pocket 7 will be created at the end of the project when you wrap the back, sides and bottom of the pallet like a present.
Step 2 – Measure the width of the pallet compartments. Both sides of the pallet compartments should be the same, but it doesn’t hurt to check.
Step 3 – Once you’re done measuring, cut your landscaping fabric to size.
Step 4 – Working from the bottom up staple the long pockets first, so pockets 6, 4, 2 will go first (yellow lines in diagram). Then staple pockets 5, 3, 1 (red lines in diagram).
Step 5 – After the pockets are in place, wrap the bottom and sides of the pallet like a present. This will create pocket 7. The pic below shows off the present wrapping.

Step 6 – You can now stand stand your vertical pallet planter up against a wall and put soil in the pockets.
Step 7 – Fill your planter up with plants and flowers. We love succulents. We think this vertical pallet planter works best with succulents because they are so low maintenance and gorgeous. Make no mistake, your vertical pallet planter will require lots of plants to fill it up.
Side note: You should use your pallet planter for growing non-edibles only. Pallets transport all sorts of products and are chemically treated to stay bug free. You don’t want these chemicals in your edible goodies. For those dreaming of a herb pallet planter, some pallets are heat treated rather than chemically treated. These pallets are marked with an HT. They are harder to find.
There are lots of other great upcycle ideas for growing herbs. Check out this vertical plastic bottle herb garden.
And you’re done, enjoy your new vertical pallet planter. Happy upcycling!
Great tutorial. I like the graphic that you put up to explain how to create the pockets. It was really helpful.
Here’s how mine turned out. Did you succulents live throughout the year?
http://typearamblings.blogspot.ca/2014/05/patio-garden.html
I make the pocket like your instructions but i have also added a wall paper tray. They hold the water a little better and don’t leak as much. Thanks for the great instructions.
I think that planting herbs in plastic is not much safer then planting them in chemically treated wood.
I use Heat treated wood pallets only. Most pallets for reg use unless used by chem production industries are heat treated. These are considered safe for use and have worked well for our many pallet gardens.
Hi…how do you know that your pallets are heat treated …and where did you find them?
Thanks,
Mary
Hi Mary, look for pallets marked with ‘HT’ either on the side of the road or on your local online classifieds.
I will build a koi pond madeup of wooden pallet frame, a chair for me, wife and daughter to sit and enjoy watching and feeding our koi fish, dog house and chicken coop