
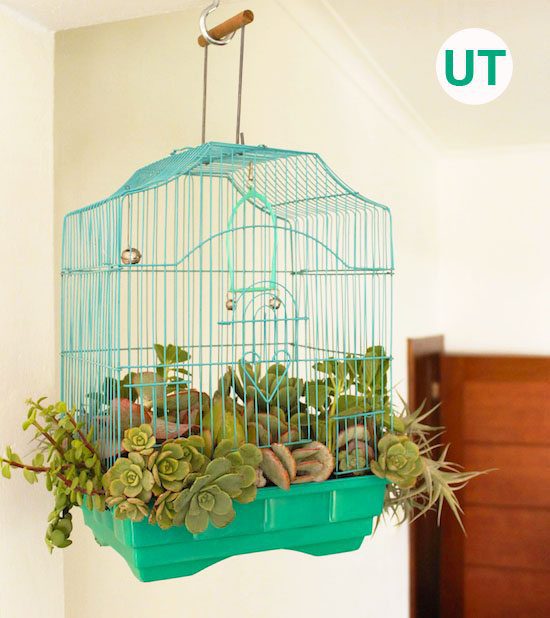
Do you love succulents as much as we do? If so, odds are you will love this birdcage planter. This birdcage planter makes for an easy upcycle. With little more than succulents, a birdcage and soil you can add a splash of greenery to your home or garden. Find out how to make your own birdcage planter!

Here at Upcycle That we have an absolute passion for succulents. Succulents are awesome plants for upcycling as they require little water and can be planted almost anywhere! Pallets, corks and bricks are just some of the succulent-based upcycles we’ve showcased. A few weeks ago we featured a birdcage planter on our Facebook page and the crowd went wild! Happy to please our upcyclers, we immediately went on the hunt for a birdcage to repurpose. We found this turquoise gem at our local flea market. It was looking a little worse for the wear with some loose metal rods. Nonetheless, we thought it would make for a spectacular birdcage planter. So we took it home and got cracking!
How to make a birdcage planter
Once you’ve found your birdcage, give it a good soapy wash with disinfectant. Next determine if you need to give any additional TLC by reinforcing any loose metal rods etc. Once sorted assemble your succulents for use. One of the best things about succulents is that they grow easily from cuttings. If you’re lucky enough to have some big succulent plants in your garden, go ahead and cut some clippings to work with. Otherwise you can pick up some plants from your local nursery.

The next thing we did was affix our birdcage base to the metal top. We thought of numerous possibilities for this and settled upon the simple solution of plastic zip ties. Our plastic base had a couple slits on each side so it was easy to slip the zip ties in and secure through the metal rods. If your base doesn’t have any slits you might have to create some or come up with an alternative method of affixing it. We attached one side first so that we were able to plant comfortably.

We then filled the base of our birdcage planter with soil. Because there was an open slot on one side of the plastic base we reinforced the area with a bit of landscaping fabric. This allowed our soil to stay contained. We then started filling our birdcage planter with succulents.

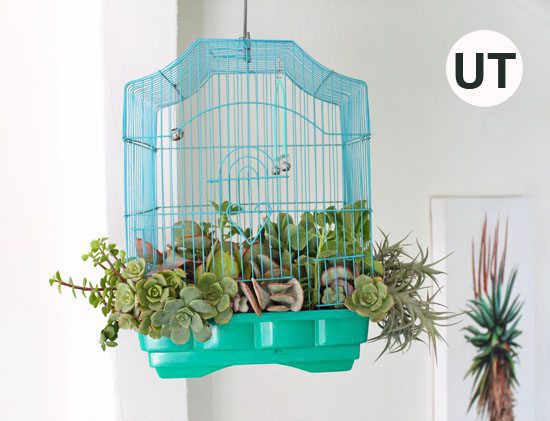
Once the inside of our planter was filled we closed it up. We then secured the second side of the birdcage planter with plastic zip ties. Now working from the outside in, we started adding some accent succulents to the outer sides of the planter.

Satisfied our birdcage planter was complete we hung it up using a ceiling hook.
Love this I’m going to trie this out with some of my many house plants thank you
Great idea! Ans so simple to do ourselves
Hi, Love this! I’m considering planting something in an old cheese grater. Do you think that would be possible?
Oh definitely! Please send us a pic of the completed planter 🙂
Sure, do you have an email-address or how do I send you the pic?
Chi-chi-chi-chia cheese grater planter! Chia seeds are available everywhere now!
This looks amazing! I want to make one for my home. Thanks
Yes like the bird cage and I would rather get a round one.